A practical guide to using Helicon Focus for mushroom and macro photography. Covers file organisation, selective image import, the three rendering algorithms, common artefacts and how to fix them, and the other tools inside the software worth knowing about.
Contents
- Why Helicon Focus?
- Organising your files before you start
- Importing and selecting images
- The every-other-frame trick
- The three rendering methods
- Auras, ghosting and other problems
- Other useful tools in Helicon Focus
Why Helicon Focus?
If you are doing focus stacking seriously, Helicon Focus is the software most macro photographers end up using. It is dedicated stacking software, meaning it does one thing and does it very well, rather than being a general-purpose editor with stacking added as a feature. The results are noticeably better than Photoshop’s Auto-Blend Layers for complex stacks, it handles large numbers of frames efficiently, and the three rendering algorithms give you real control over the output depending on your subject.
It is available on a subscription basis with a free trial, which is worth using to test it on your own images before committing. For anyone serious about macro photography of fungi and slime molds, it is one of the most worthwhile pieces of software you can invest in.
Organising your files before you start
Good organization before you open Helicon Focus saves a lot of time. If you are processing multiple stacks from a single outing, keeping each stack in its own clearly labeled folder is essential. Without this, you end up scrolling through hundreds of similar-looking frames trying to figure out where one stack ends, and the next begins.
The easiest way to separate stacks is by time. Most cameras embed the capture time in the file name or metadata, and a gap of even a minute between groups is usually enough to distinguish one stack from the next. On a large monitor, you can often separate stacks visually by looking at thumbnails and spotting where the focus position clearly changes between groups. A simple habit in the field also helps: give yourself a few seconds between stacks or take a reference shot of your hand between subjects. It takes almost no time and makes grouping obvious when you get back to the computer.
Importing and selecting images
When you import a stack into Helicon Focus, you do not have to include every frame you shot. Being selective about which frames you include gives you more control over the final result and often produces a cleaner stack than including everything blindly.
The key principle is to include only frames where the focus actually lands on the subject. If you shot 40 frames but the first five are focused in front of the mushroom and the last five are focused behind it, those edge frames introduce out-of-focus data that the algorithm has to work around. Trimming the stack to only the frames that cover the subject produces a cleaner result.
This is also where you can make deliberate, creative decisions. If you want only the cap sharp and the background to stay blurred, include only the frames covering the cap. If you want full sharpness from front to back, include the complete sequence. The software blends whatever you give it, so what you select going in directly determines what comes out.
The every-other-frame trick
One of the most useful practical tips for large stacks is to try processing every other frame rather than every frame. Instead of importing all 40 images, import frames 1, 3, 5, 7 and so on, skipping every second one.
This works because consecutive frames in a well-shot stack have significant overlap in their sharp zones. The software does not need every frame to produce a clean result, and using every other frame cuts processing time roughly in half while often producing results that are indistinguishable from the full stack. If the result has gaps or looks thin in coverage, you can go back and add the skipped frames. But in many cases the reduced stack is completely sufficient and noticeably faster.
This is particularly useful for very large stacks from extreme magnification setups using extension tubes or the Raynox DCR-250, where 100-frame stacks are common and processing time adds up quickly.
The three rendering methods
Helicon Focus offers three rendering algorithms: Method A, Method B, and Method C. Each approaches the blending problem differently. There is no single right answer and trying more than one on a difficult stack is always worth doing.
Method A: Weighted Average
Best for: simple subjects, clean smooth surfaces
Method A calculates the sharpness of each pixel based on contrast, then averages all frames together weighted by that sharpness score. It produces smooth, clean results on subjects without a lot of fine overlapping detail. A good starting point for straightforward mushroom caps and stems. Can produce slight softness on subjects with very fine surface textures.
Method B: Depth Map
Best for: subjects with clear depth separation
Method B creates a depth map by identifying which source frame contains the sharpest version of each pixel, then uses that map to assemble the final image. Produces very clean edges and works well where different parts of the image are at clearly distinct depths. Can struggle with complex overlapping structures and sometimes produces harder, more visible transitions between focus zones.
Method C: Pyramid
Best for: complex subjects, fine detail, fungi and slime molds
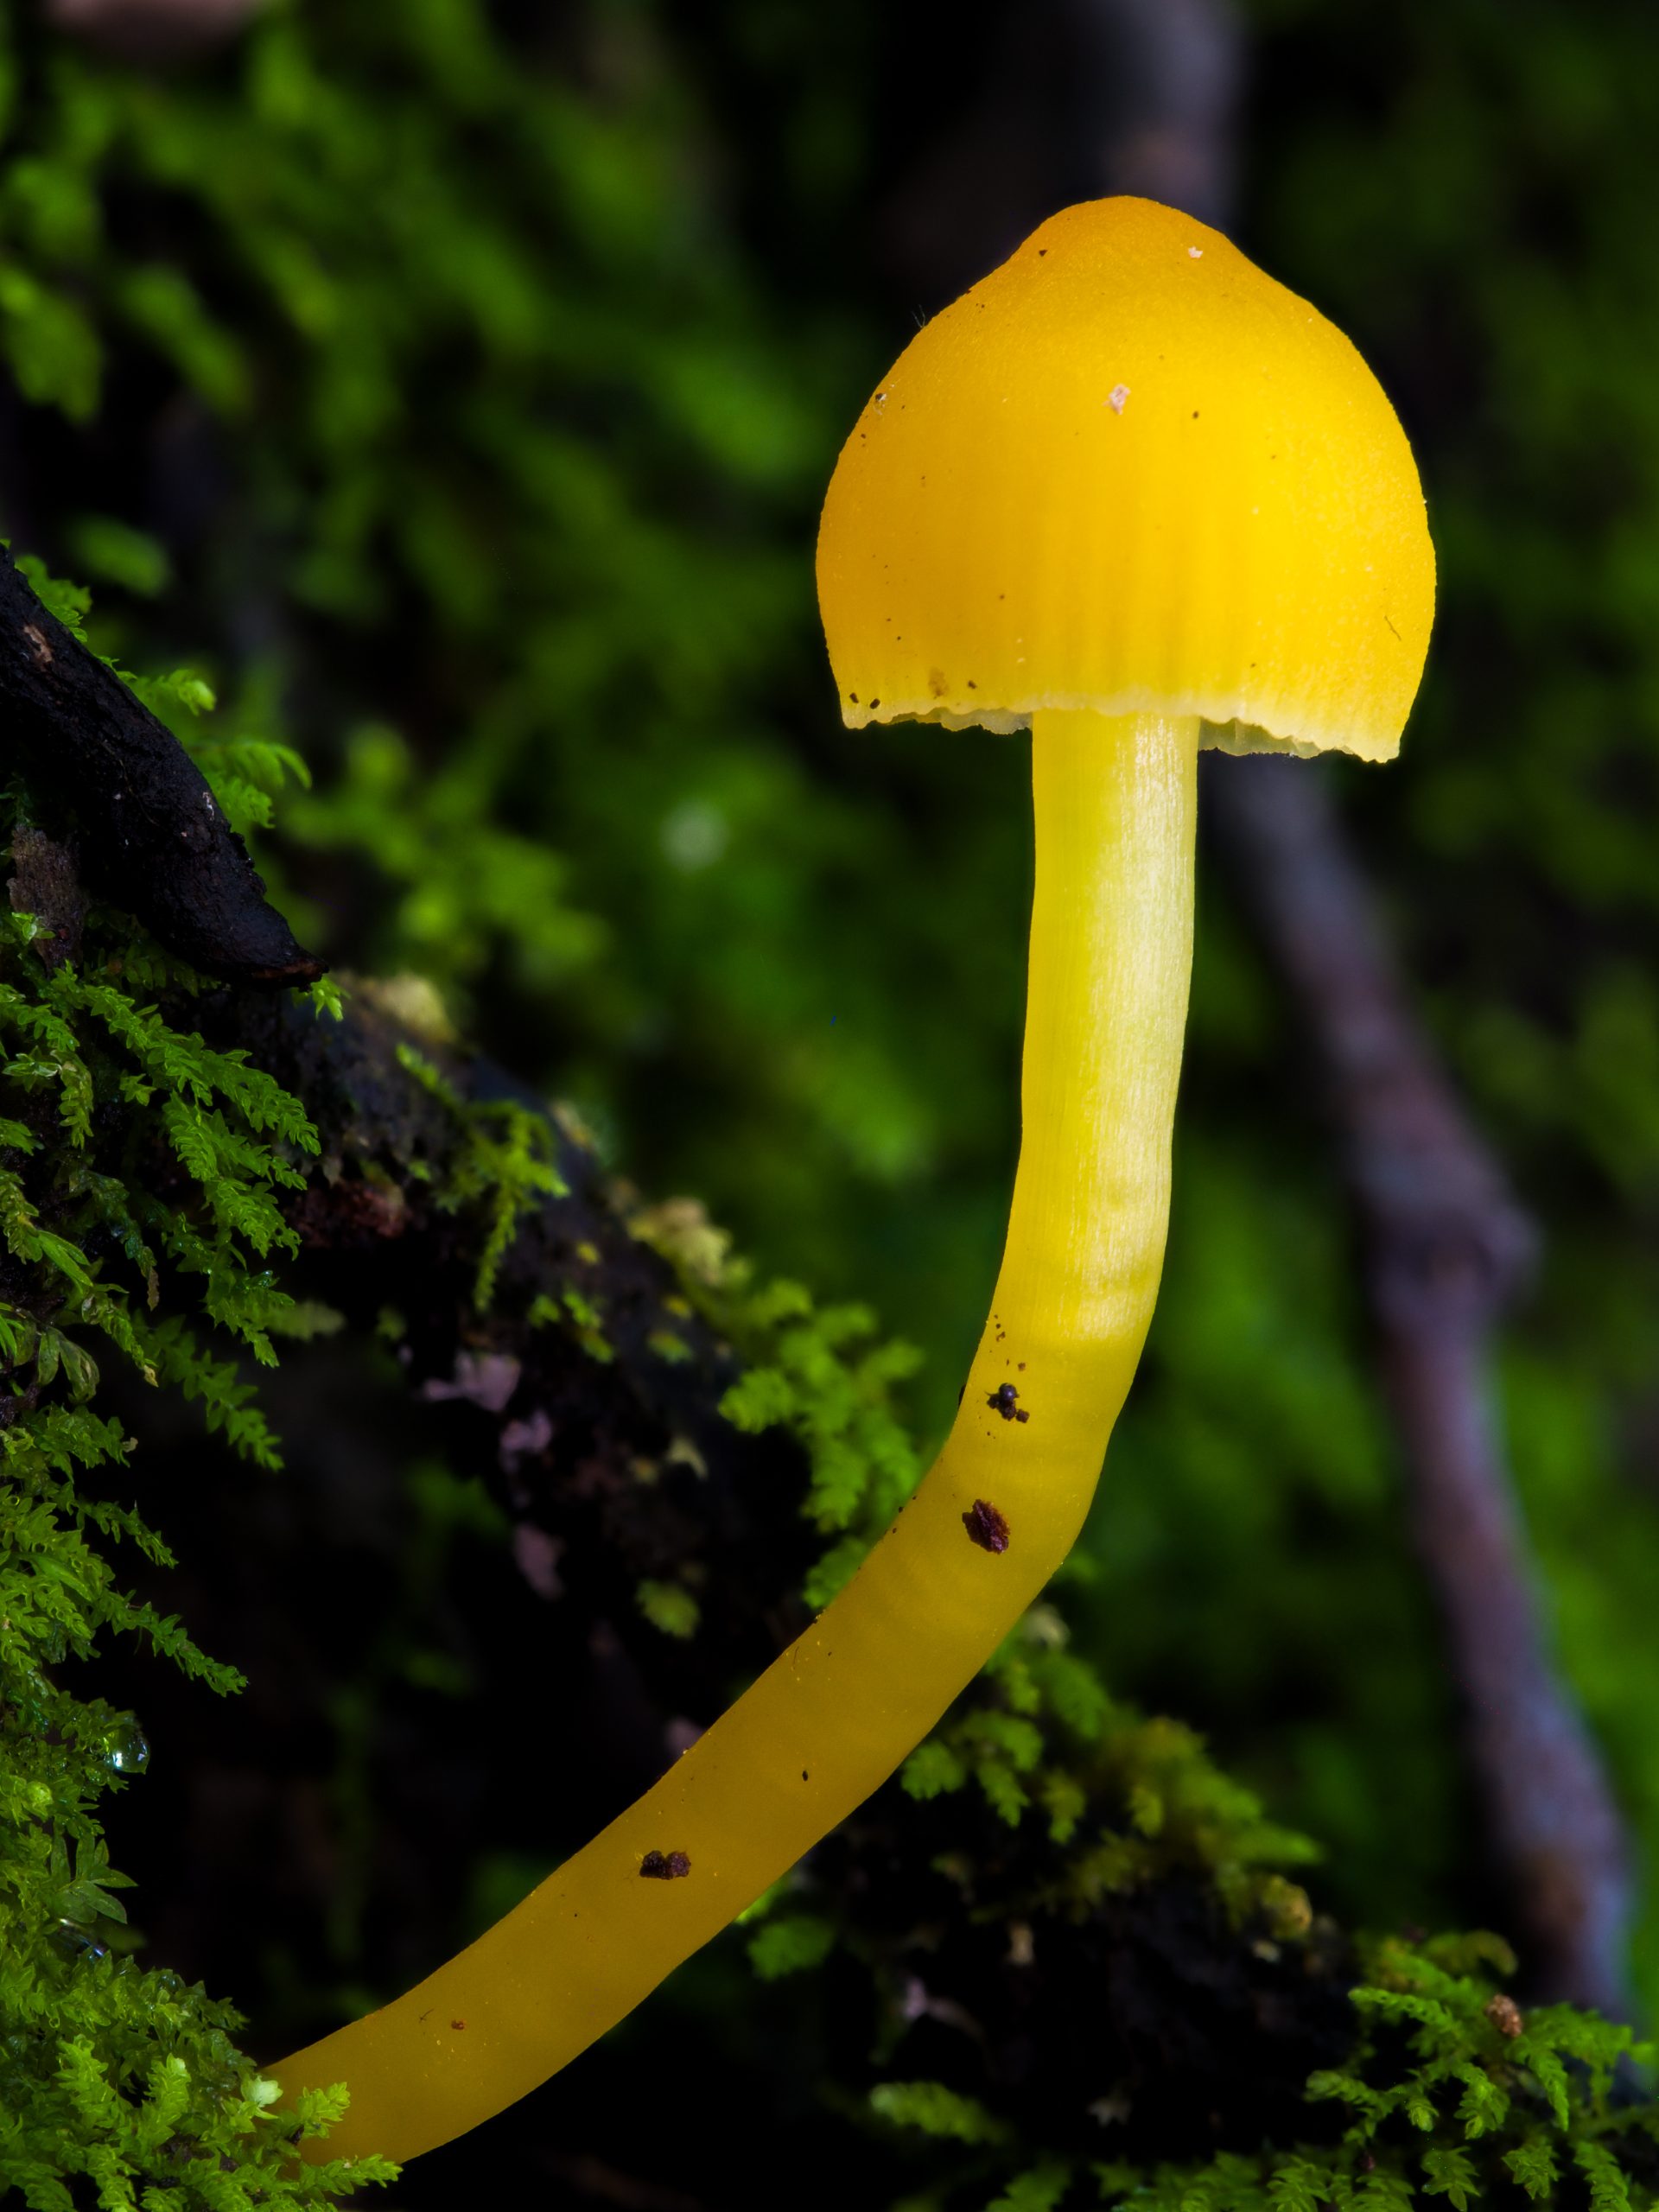
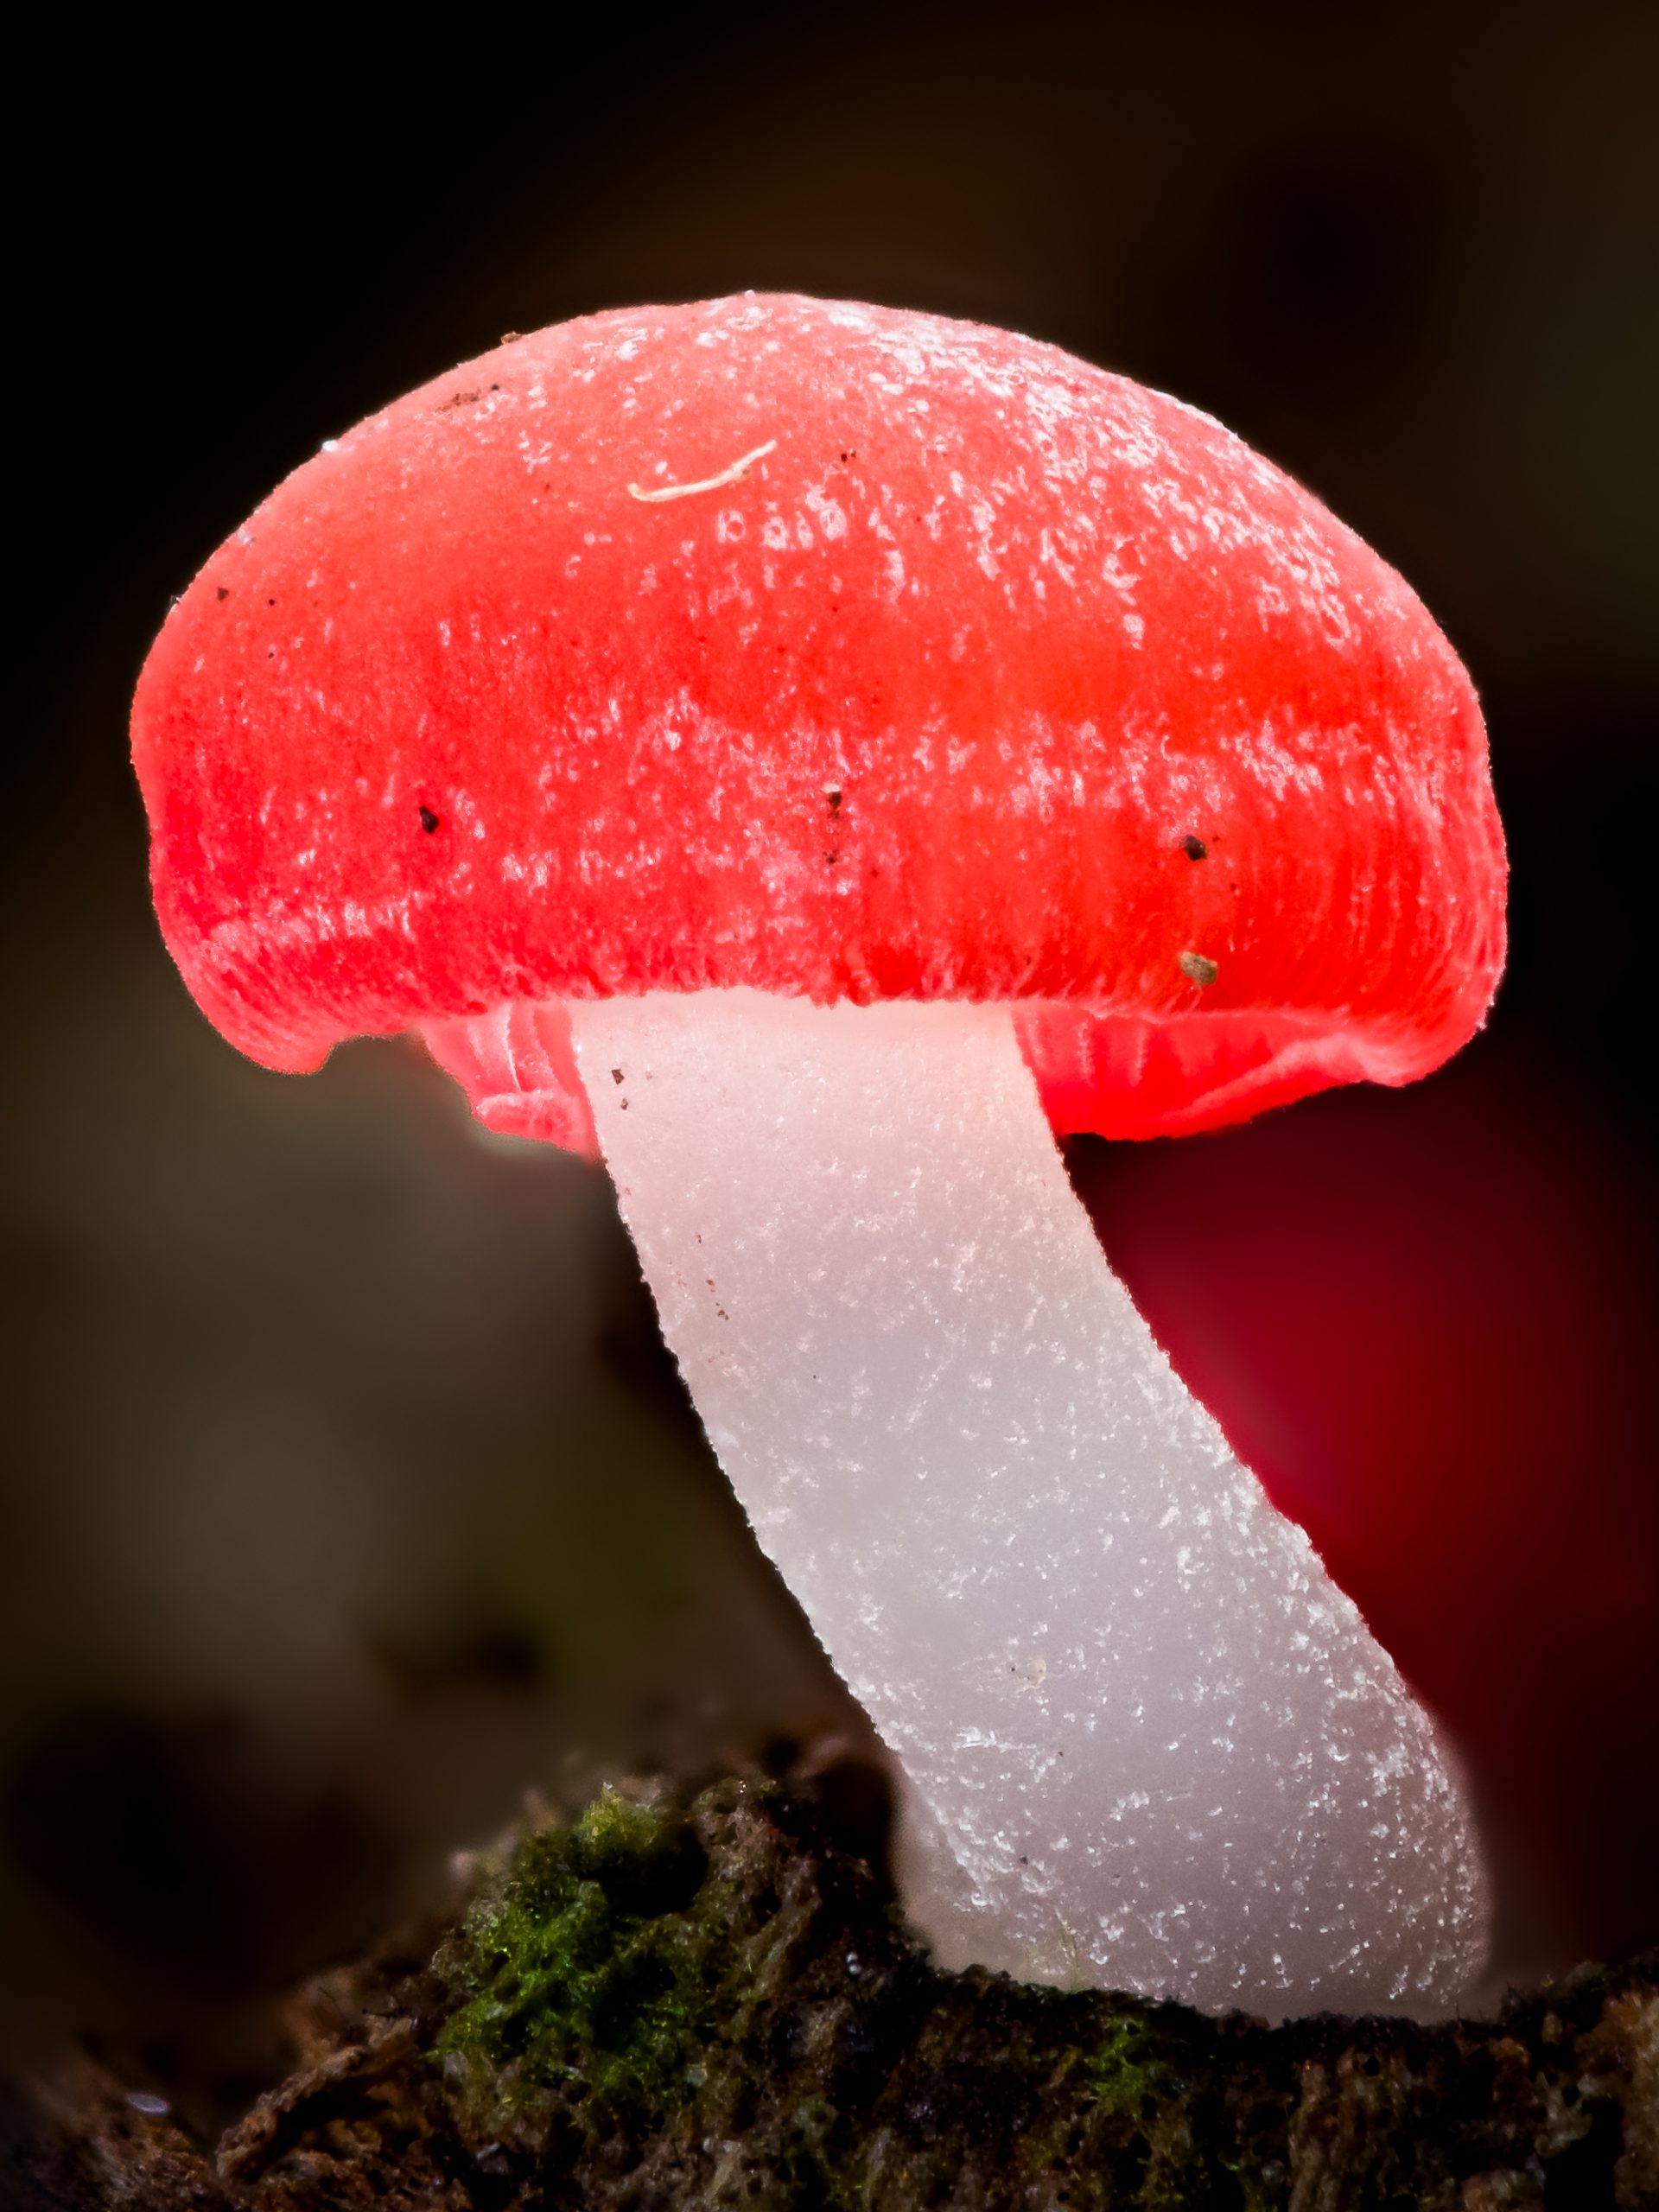
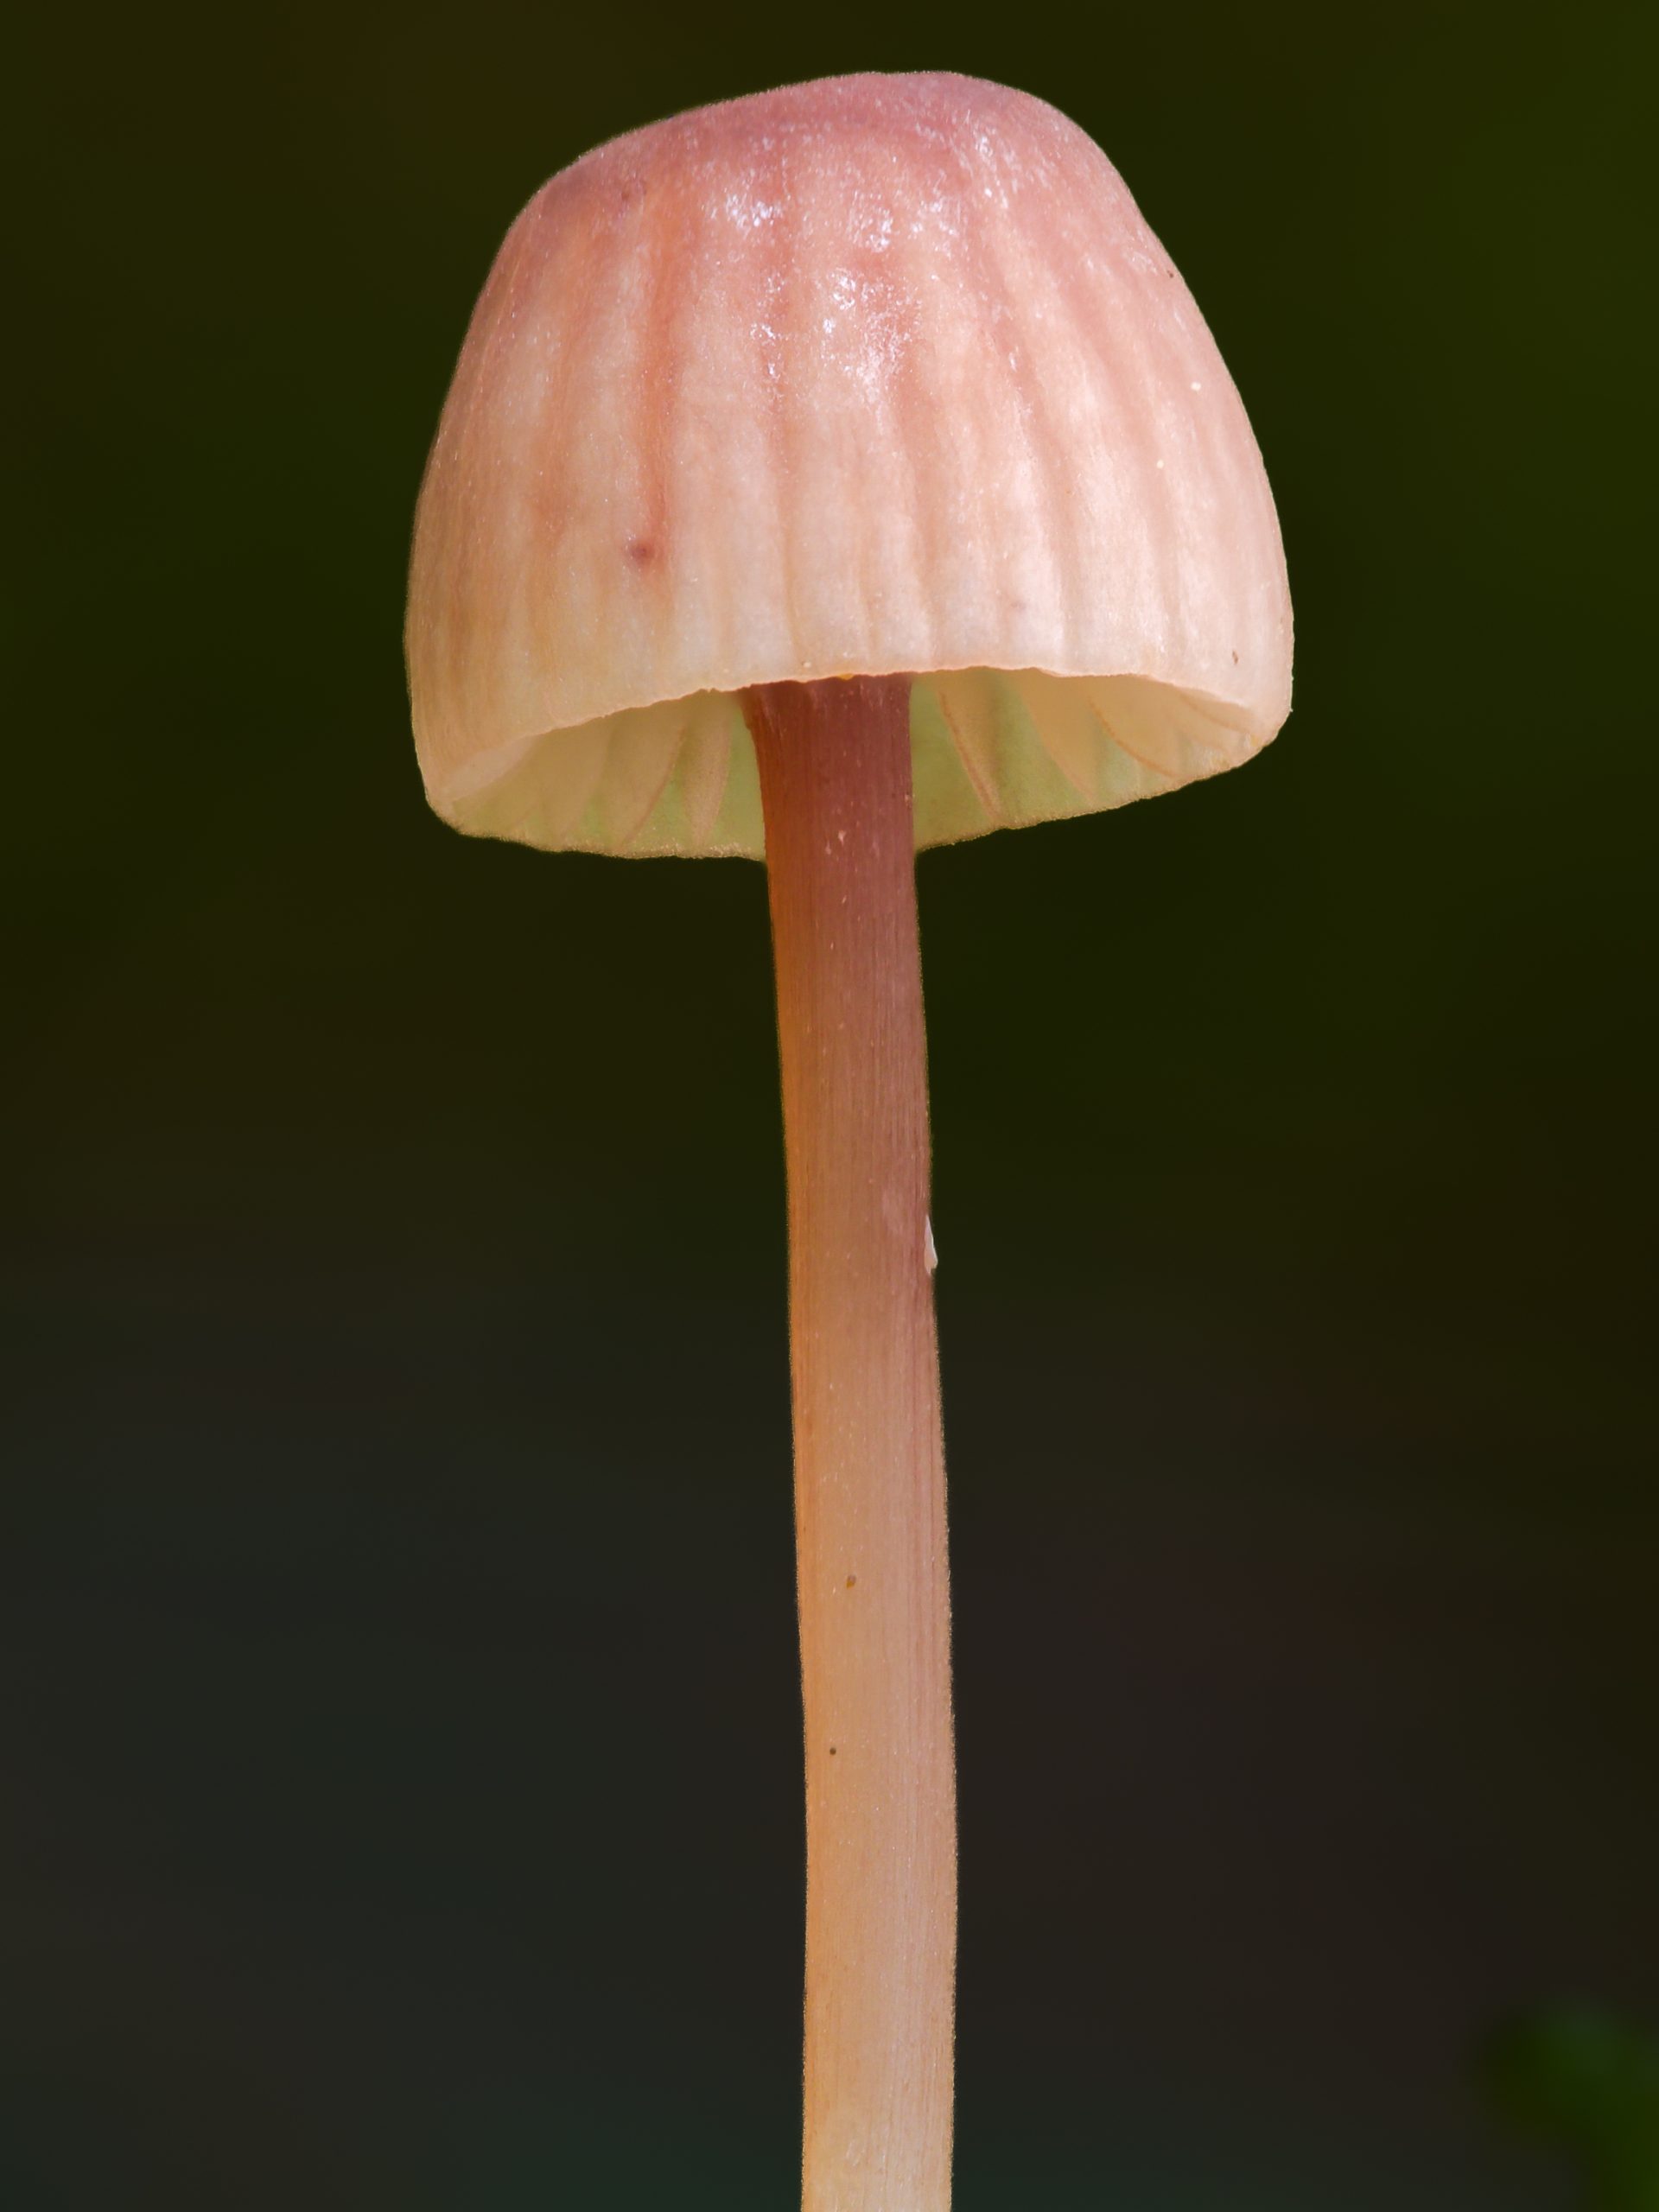
Method C uses a pyramid blending approach that is particularly good at preserving fine detail in challenging subjects including overlapping structures, fine gill textures, and the complex surface detail found in many fungi and slime molds. It is the method most macro photographers use most often for biological subjects. It can increase noise slightly and is occasionally prone to halos around high-contrast edges, but for most mushroom photography it produces the best overall results.
My approach: I usually start with Method C for mushroom and slime mold stacks. If I see halos or artefacts, I switch to Method A or B and compare. For most subjects Method C gives the cleanest and most detailed result, but testing the others on difficult stacks is always worthwhile.
Auras, ghosting and other problems
Even with good source frames, stacks do not always come out perfectly. The most common problems to watch for are auras, ghosting, and missing areas.
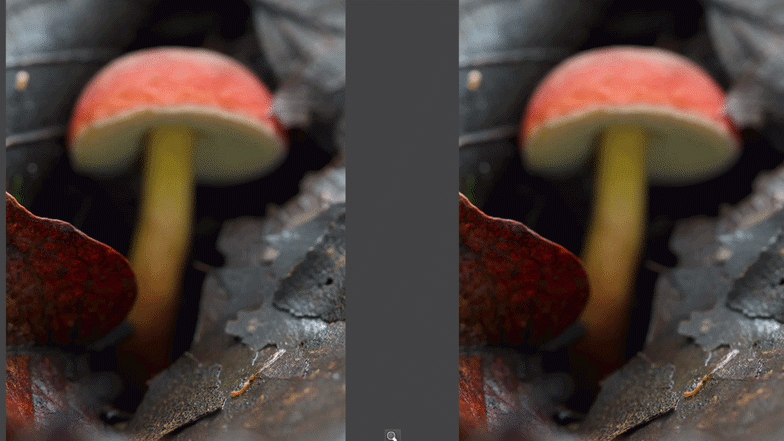
Auras are bright halos that appear around the edges of the subject, most often with Method C on high-contrast subjects where there is a strong brightness difference between the mushroom and the background. If you see a glow around the edges, try Method A or B. Adjusting the Smoothing parameter can also help.
Ghosting, where fine details appear doubled or blurred, usually means there was subject movement between frames. Wind is the most common cause in field photography. Method B can sometimes handle small misalignments better than the others. The best fix is prevention: shoot in still air, early in the morning when wind is typically lowest.
Missing or soft areas in the final image usually mean a gap in the focus sequence where no frame had that zone in focus. The fix is straightforward: find the gap in your source frames and add in any skipped images that cover it.
Always check your result at 100%. Problems that are invisible at a zoomed-out view become obvious at full size. Zoom into the gills, the cap edges, and the base of the stem before you consider a stack finished.
Other useful tools in Helicon Focus
Retouching
The retouching tool lets you fix problem areas in the final stack by painting in data from specific source frames. If one zone has an artefact or came out blurry, you can select the source frame where that area looks correct and paint it in manually. Very useful for fixing small localised problems without reprocessing the whole stack.
3D model
Helicon Focus can generate a basic 3D model from a focus stack, letting you rotate the subject and view it from different angles. More of a documentation and novelty feature than a practical tool for most photographers, but genuinely interesting for scientific records and something no other common stacking software offers.
Scale bar and text
You can add a calibrated scale bar directly to the final image, which is useful for scientific documentation and iNaturalist submissions where knowing the actual size of the subject matters. Particularly useful if you photographed a ruler or reference object in one of the frames.
Batch processing
If you have many stacks to process from a session, batch processing lets you queue them all and process automatically. A significant time saver when you come back from a field session with ten or twenty stacks to work through.
Helicon Focus has a free trial available on the Helicon Soft website, well worth testing on your own images before committing. If you are still getting to grips with the concept of focus stacking itself, the focus stacking explainer is a good starting point. For the camera and lens side of the workflow, the guides on cameras with focus stacking capability and macro lenses for mushroom photography cover what equipment works best.
Best of luck out there.